Our article continues below with additional information and pictures for these steps. Adding a horizontal line to a document is a helpful way to indicate the end of a section, or to separate different elements. But the default method of adding a horizontal line in Google Docs via the Insert menu doesn’t give you a lot of customization options. Fortunately there is another way to add a horizontal line and adjust its properties, including the width of the line. Our guide below will show you adjust horizontal line thickness in Google Docs. Find out how to add a new page on Google Docs if you have been trying to put new content in the middle of an existing document.
How to Change Width of a Horizontal Line in Google Docs
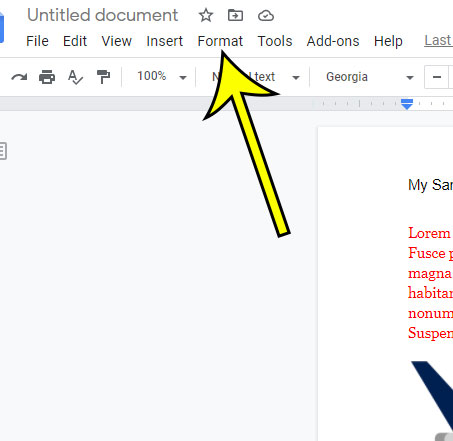
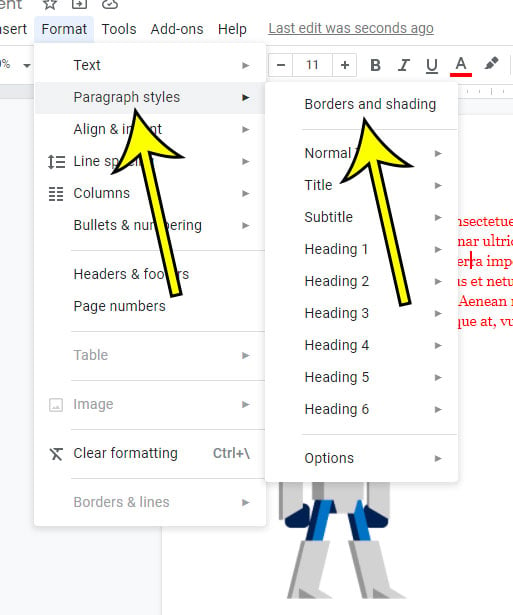
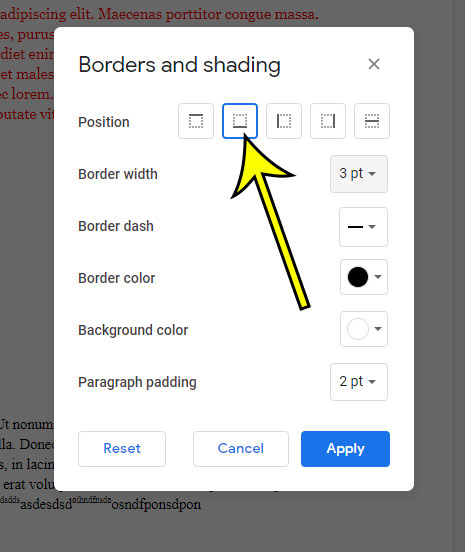
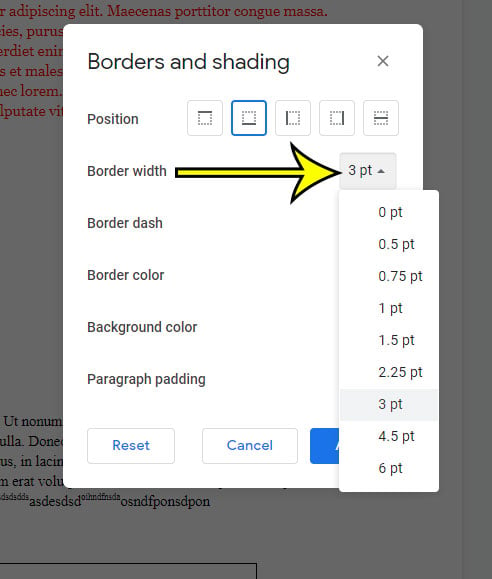
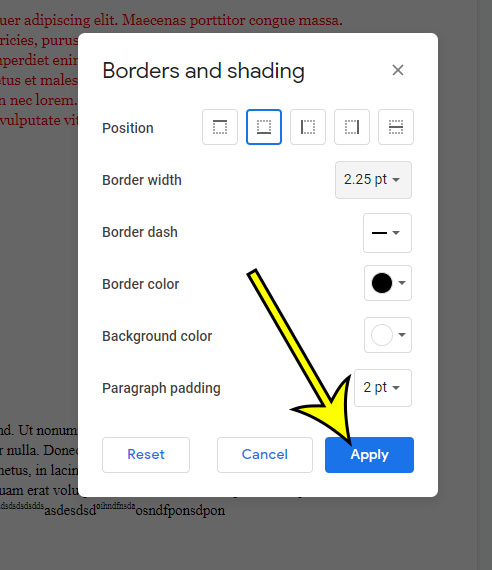
The steps in this article were performed in the desktop version of the Google Chrome Web browser, but will also work in other desktop browsers like Firefox or Edge. Step 1: Sign into Google Drive and open your document. Step 2: Click inside the paragraph above which you wish to add the horizontal line. Step 3: Select the Format tab at the top of the window. Step 4: Choose Paragraph styles, then Borders and shading. Step 5: Click the Bottom border option at the top of the window. Step 6: Click the Border width button and choose the desired horizontal line thickness. Step 7: Adjust any of the other options on this menu as needed, then click the Apply button. While the method above doesn’t allow you to customize an existing horizontal line in Google Docs, it does allow you to create a new one that is functionally identical. If you already had a horizontal line in that location you can delete it by placing your cursor at the start of the line below the horizontal line, then press the Backspace key on your keyboard. He specializes in writing content about iPhones, Android devices, Microsoft Office, and many other popular applications and devices. Read his full bio here.

