When you encounter a file like this, the transparent parts are indicated by a gray grid. But, depending on how you work, the current color of that transparency grid may not be ideal. Our tutorial below will show you how to change the color of this element of Photoshop so that you can more easily identify the opaque and transparent portions of your image. Do you need to remove the background from one of your pictures? Our article on how to create a transparent background in Photoshop can show you how.
How to Switch to a Darker or Lighter Transparency Grid in Photoshop CS5
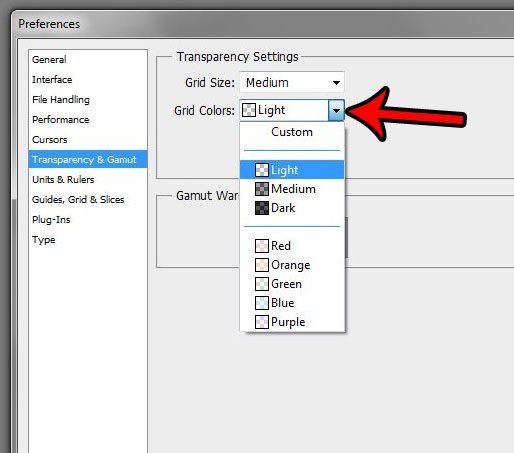
The steps in this article were performed in Photoshop CS5. You will be able to select from several different options for the color of the grid that is displayed when you have transparent parts of your image. Step 1: Open Photoshop. Step 2: Click the Edit tab at the top of the window. Step 3: Choose the Preferences option at the bottom of this menu, then select Transparency & Gamut. Step 4: Click the dropdown menu to the right of Grid color, then choose the desired color scheme. Note that you can also specify the size of the grid squares as well. When you’re done, click the OK button. When you’re finished working with your transparent image, it’s important that you save it to a file type that supports transparency. This article will show you how to do that.
After receiving his Bachelor’s and Master’s degrees in Computer Science he spent several years working in IT management for small businesses. However, he now works full time writing content online and creating websites. His main writing topics include iPhones, Microsoft Office, Google Apps, Android, and Photoshop, but he has also written about many other tech topics as well. Read his full bio here.
You may opt out at any time. Read our Privacy Policy


