This article was written for iOS 6. You can read the updated article for iOS 7 here.
How to make App Folders on the iPhone 5
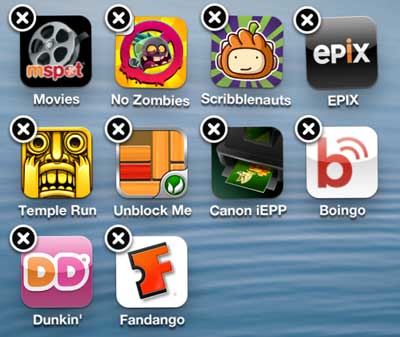
It is important to note that this is slightly different than creating folders on your Mac or Windows computer. Your iPhone is going to automatically create a folder with a name that describes the types of applications contained within that folder. But, once the folder has been created, you can move it around on your phone the same way that you would any other installed app. You can also give the folder a different name, if you so choose. Step 1: Hold your finger on one of the apps that you want to put into a folder until the app shakes and an X appears in the upper-left corner.
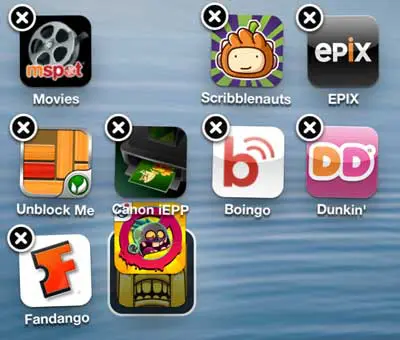
Step 2: Drag the icon on top of one of the other apps that you want to include in the folder. It will create the folder automatically once the apps are positioned correctly. It can be a little tricky to get the positioning right, so just keep at it until the folder is created.
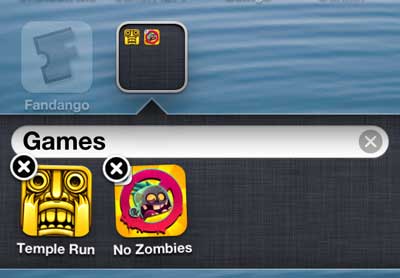
Step 3: Tap inside the folder name field at the top of the folder section on the screen, then type your desired name for the folder and tap Done when you are finished.
Step 4: Drag any other apps on top of this folder to include them. If you decide later that you want to remove an app from your created folder, simply tap the folder once to open it, then hold your finger on the app you want to remove and drag it to the desired spot on one of your home screens. Are you getting annoyed with the sound that your iPhone plays each time you lock or unlock your device? You can follow the steps in this article to learn how to disable that sound. After receiving his Bachelor’s and Master’s degrees in Computer Science he spent several years working in IT management for small businesses. However, he now works full time writing content online and creating websites. His main writing topics include iPhones, Microsoft Office, Google Apps, Android, and Photoshop, but he has also written about many other tech topics as well. Read his full bio here.
You may opt out at any time. Read our Privacy Policy


