But the option for the fill handle in Excel 2013 can be turned on or off, so you might find that it is not working as you would expect. Our guide below will point you to the fill handle setting so that you can turn it back on and start taking advantage of this very useful feature. If you would like to be able to use cursive or script fonts in Word and Excel, then our signature font in Word tutorial can show you how.
Turning on the Excel 2013 Fill Handle
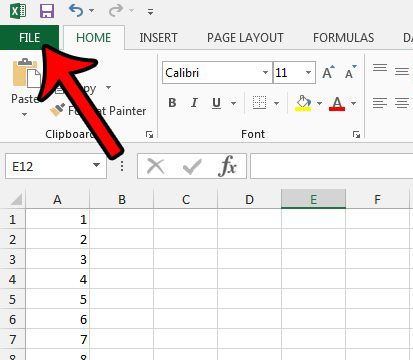
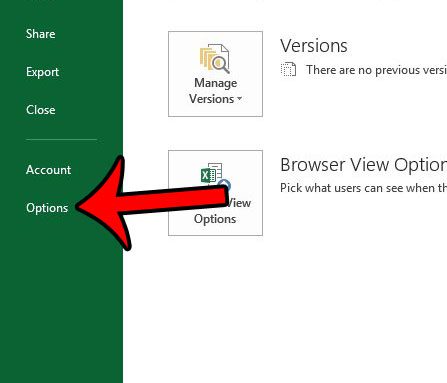
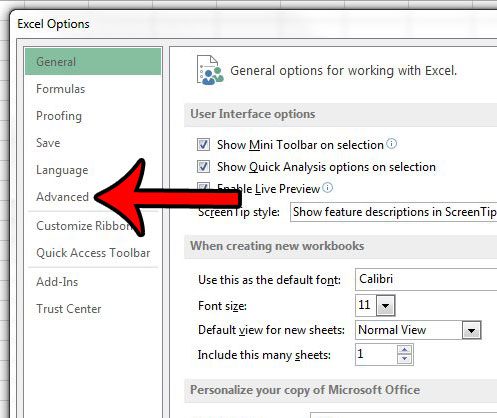
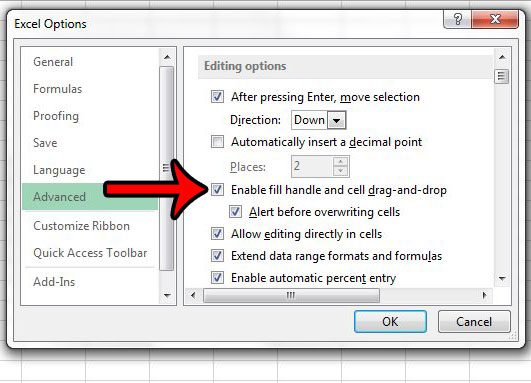
The steps below assume that you are currently unable to use the fill handle in Excel 2013. If you are using Excel 2010 then the method for enabling the fill handle is very similar, but you can click here to read the directions for that Excel version instead. Step 1: Open Excel 2013. Step 2: Click the File tab at the top-left corner of the window. Step 3: Click Options at the bottom of the column on the left side of the window. This opens a window titled Excel Options. Step 4: Click the Advanced button in the column at the left side of the Excel Options window. Step 5: Check the box to the left of Enable fill handle and cell drag-and-drop. You can also select whether or not you would like Excel to alert you if you are about to overwrite a cell. Once you are finished, click the OK button at the bottom of the window. Would you like to make repeated data entry in Excel 2013 a little faster? Learn about the AutoComplete option and see if it is something that will improve your experience with the program.
Additional Sources
After receiving his Bachelor’s and Master’s degrees in Computer Science he spent several years working in IT management for small businesses. However, he now works full time writing content online and creating websites. His main writing topics include iPhones, Microsoft Office, Google Apps, Android, and Photoshop, but he has also written about many other tech topics as well. Read his full bio here.
You may opt out at any time. Read our Privacy Policy


