Fortunately most of the elements in Word 2010 can be hidden, allowing you to customize the layout of the program to meet your own preferences. Our article below will show you how to hide the ruler that is displayed above your document body if you find it to be unnecessary, or if you prefer to have your document begin higher in the window. If you would like to manage your margins in a different unit of measurement, then our guide on switching from inches to cm in Microsoft Word can help you.
Remove the Ruler from View in Microsoft Word 2010
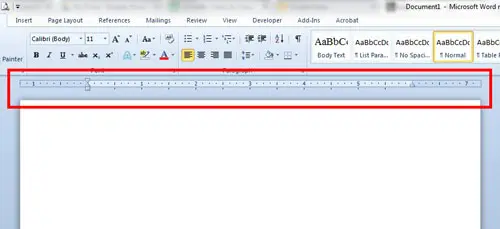
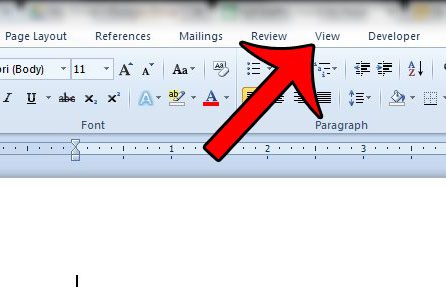
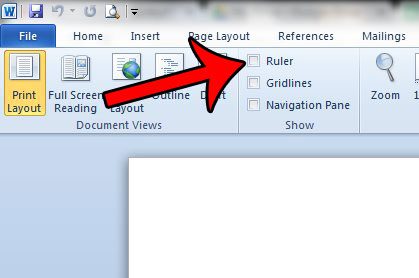
The steps in this article will change the layout of your Microsoft Word 2010 screen by removing the ruler. The ruler that will be removed is the one above the document. The item to be removed is identified in the image below. Note that the ruler setting is saved with Microsoft Word 2010 itself, and not the individual document. So if you hide the ruler one document, it will also be hidden for the next document. If you wish to display the ruler again, then you will need to re-enable it by checking the box identified below in Step 3. Step 1: Open your document in Microsoft Word 2010. Step 2: Click the View tab at the top of the window. Step 3: Uncheck the box to the left of Ruler in the Show section of the Office ribbon. The ruler will disappear immediately after you clear the check mark. Do you have a document that you are creating for work or school which needs to have exactly one inch margins? This article will show you how to set margins to meet these requirements. After receiving his Bachelor’s and Master’s degrees in Computer Science he spent several years working in IT management for small businesses. However, he now works full time writing content online and creating websites. His main writing topics include iPhones, Microsoft Office, Google Apps, Android, and Photoshop, but he has also written about many other tech topics as well. Read his full bio here.
You may opt out at any time. Read our Privacy Policy


