One way that you can resolve this problem is to change the printing settings for the spreadsheet so that the row and column headings are printed on every page. This is a simple adjustment to make using our short guide below.
Print Row and Column Headings on Every Page in Excel 2010
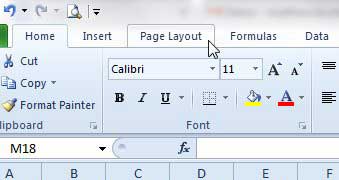
Following the steps below will only change this setting for the spreadsheet that is currently being edited. You will need to follow these steps again if you want to print the row and column headings on a different spreadsheet. The row and column headings that this method will print are the numbers and letters at the top and left of the spreadsheet. After you have followed the steps below, you can click the Print Preview button to see how the spreadsheet will look when it is printed. Step 1: Open your spreadsheet in Excel 2010. Step 2: Click the Page Layout tab at the top of the window.
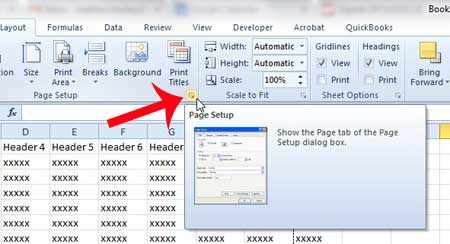
Step 3: Click the small Page Setup button at the bottom-right corner of the Page Setup section of the ribbon.
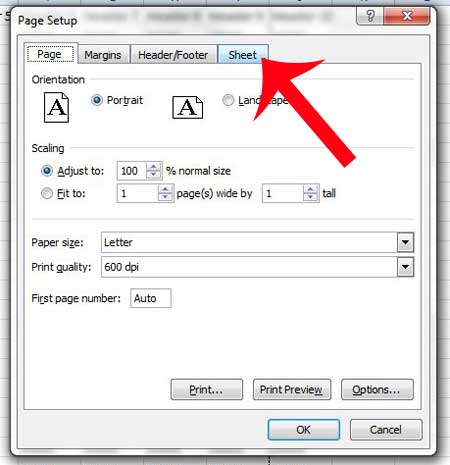
Step 4: Click the Sheet tab at the top of the window.
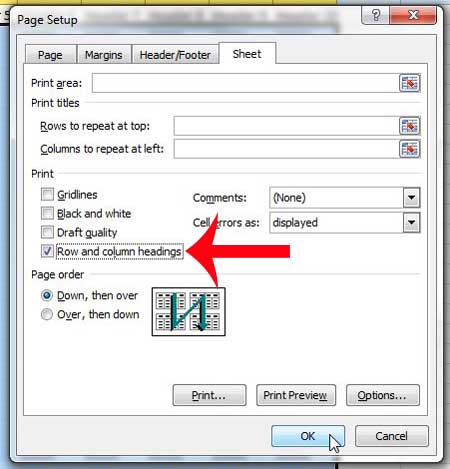
Step 5: Check the box to the left of Row and column headings in the Print section of the window, then click the OK button at the bottom of the window to confirm the changes.
Is there a column that you would like to print at the left side of every page of your spreadsheet? This article can show you how. After receiving his Bachelor’s and Master’s degrees in Computer Science he spent several years working in IT management for small businesses. However, he now works full time writing content online and creating websites. His main writing topics include iPhones, Microsoft Office, Google Apps, Android, and Photoshop, but he has also written about many other tech topics as well. Read his full bio here.
You may opt out at any time. Read our Privacy Policy


