Fortunately it is possible to delete a page break in Word 2013, although the method for doing so is not obvious at first. Our tutorial below will show you how to get rid of a page break in a Word document so that the page breaks are occurring naturally.
How to Remove a Page Break in Word 2013
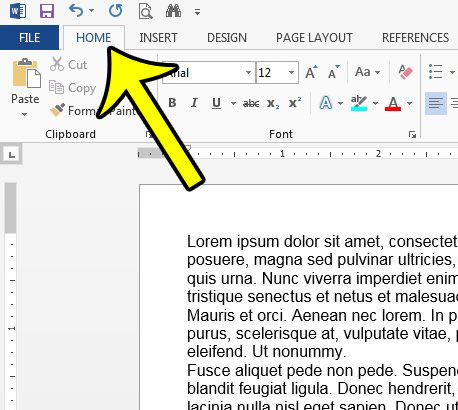
The steps in this guide will assume that there is a manual page break in your document, and that Word is not currently configured to display formatting marks. Step 1: Open your document in Word 2013. Step 2: Click the Home tab at the top of the window.
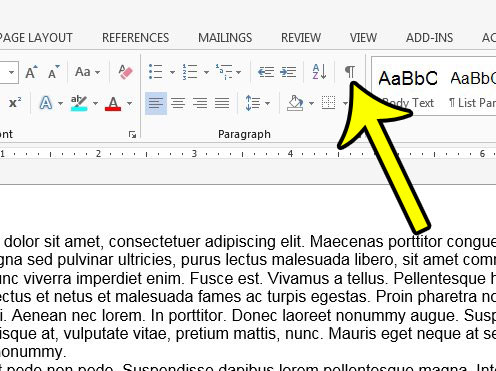
Step 3: Click the Show/Hide button in the Paragraph section of the ribbon.
Step 4: Highlight the Page Break formatting mark with your mouse.
Step 5: Press the Backspace key or the Delete key on your keyboard to remove the page break. Repeat this process for any additional page breaks that you wish to delete. You can then click the Show/Hide button again if you no longer wish or need to see the rest of the formatting marks in your document. Is there a new font that you would like to use in one of your Word documents, but you can’t figure out how to add it? Learn about adding new fonts in Word 2013 and learn how you can quickly install and begin using a font that you have found. He specializes in writing content about iPhones, Android devices, Microsoft Office, and many other popular applications and devices. Read his full bio here.