Fortunately Windows 7 can be modified to display your screen in the portrait orientation instead by changing a setting on the screen resolution menu. Our tutorial below will show you where to find this menu and identify the setting that you need to change in order to achieve this result.
How to Change Display Orientation in Windows 7
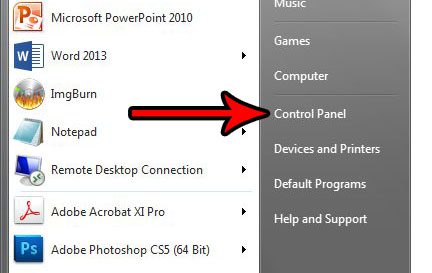
The steps in this article were performed in Microsoft Windows 7. By completing the steps in this guide you will change the orientation of your monitor’s display so that the screen is shown in portrait orientation instead of landscape. Note that this may affect programs on your computer that are unable to display in portrait orientation, and it can make some text and screen objects very small depending on your system setup. Step 1: Click the Start button at the bottom-left corner of the screen.
Step 2: Select Control Panel from the column at the right side of the menu.
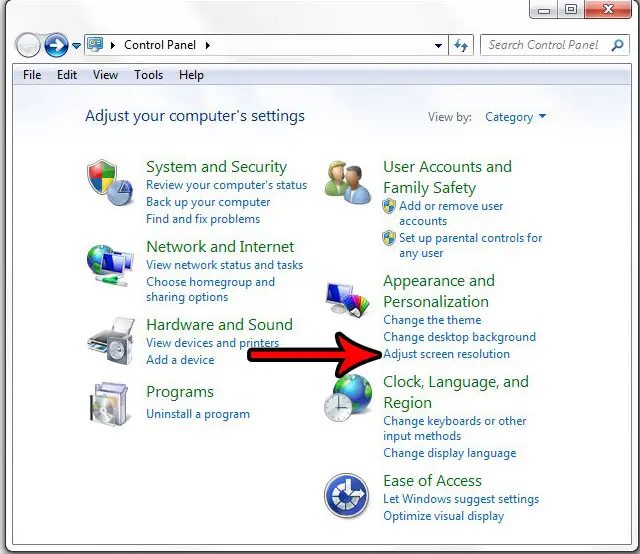
Step 3: Choose the Adjust screen resolution setting under Appearance and Personalization.
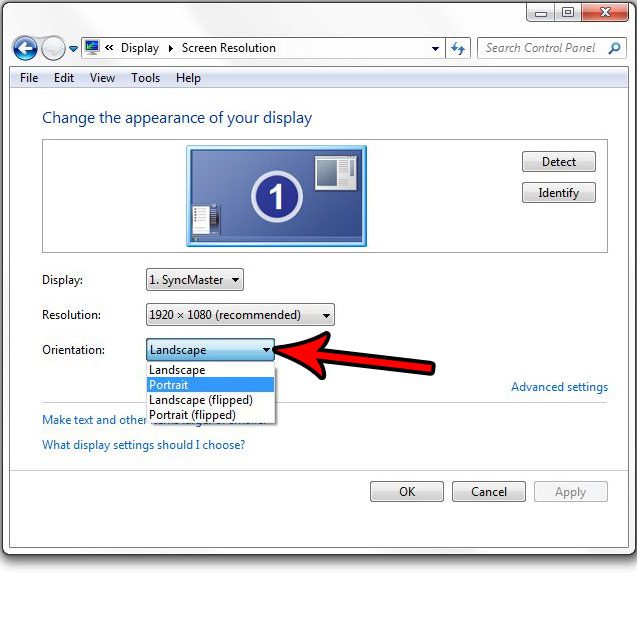
Step 4: Click the Orientation dropdown menu, choose the Portrait option, click Apply, then click the OK button at the bottom of the window to apply the change.
Note that you will have the option of reverting the change for a few seconds if you find that it isn’t what you wanted. Additionally you can always return to this menu and switch back to portrait at any time later if you would like. Does your computer automatically start playing certain types of media when you insert them into your disc drive? Find out how to turn off this setting if you don’t like it. After receiving his Bachelor’s and Master’s degrees in Computer Science he spent several years working in IT management for small businesses. However, he now works full time writing content online and creating websites. His main writing topics include iPhones, Microsoft Office, Google Apps, Android, and Photoshop, but he has also written about many other tech topics as well. Read his full bio here.
You may opt out at any time. Read our Privacy Policy


