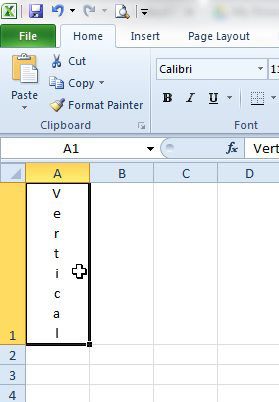
But if you are working on an Excel file that was created or edited by another person, then you might have vertically oriented text that you do not want. Fortunately you can switch from vertical to horizontal with just a few simple steps, which we will guide you through in our short tutorial below.
Change from Vertical to Normal Text in Excel 2010
The steps in this article will assume that you have an Excel spreadsheet that contains text which is currently displayed vertically. Our guide will show you how to quickly switch vertically displayed text back to horizontal display. Step 1: Open your spreadsheet in Excel 2010. Step 2: Select the cell(s) that contain the vertical text which you want to change. You can select entire rows by clicking the number to the left of the spreadsheet, and you can select entire columns by clicking the letter above the spreadsheet. You can select the entire worksheet by clicking the button at the top-left of the spreadsheet between the 1 and the A.
Step 3: Click the Home tab at the top of the window.
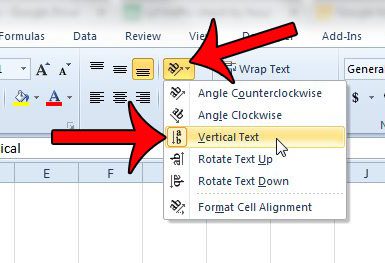
Step 4: Click the Orientation button in the Alignment section of the navigational ribbon, then click the Vertical Text option. If some of the cells that you have selected were not oriented vertically, then you will need to repeat this step.
Do some of your cells have strange formatting that you are having trouble undoing? Learn how to clear all cell formatting in Excel 2010 with just a couple short steps. After receiving his Bachelor’s and Master’s degrees in Computer Science he spent several years working in IT management for small businesses. However, he now works full time writing content online and creating websites. His main writing topics include iPhones, Microsoft Office, Google Apps, Android, and Photoshop, but he has also written about many other tech topics as well. Read his full bio here.
You may opt out at any time. Read our Privacy Policy


